Survey plan with SDBOX
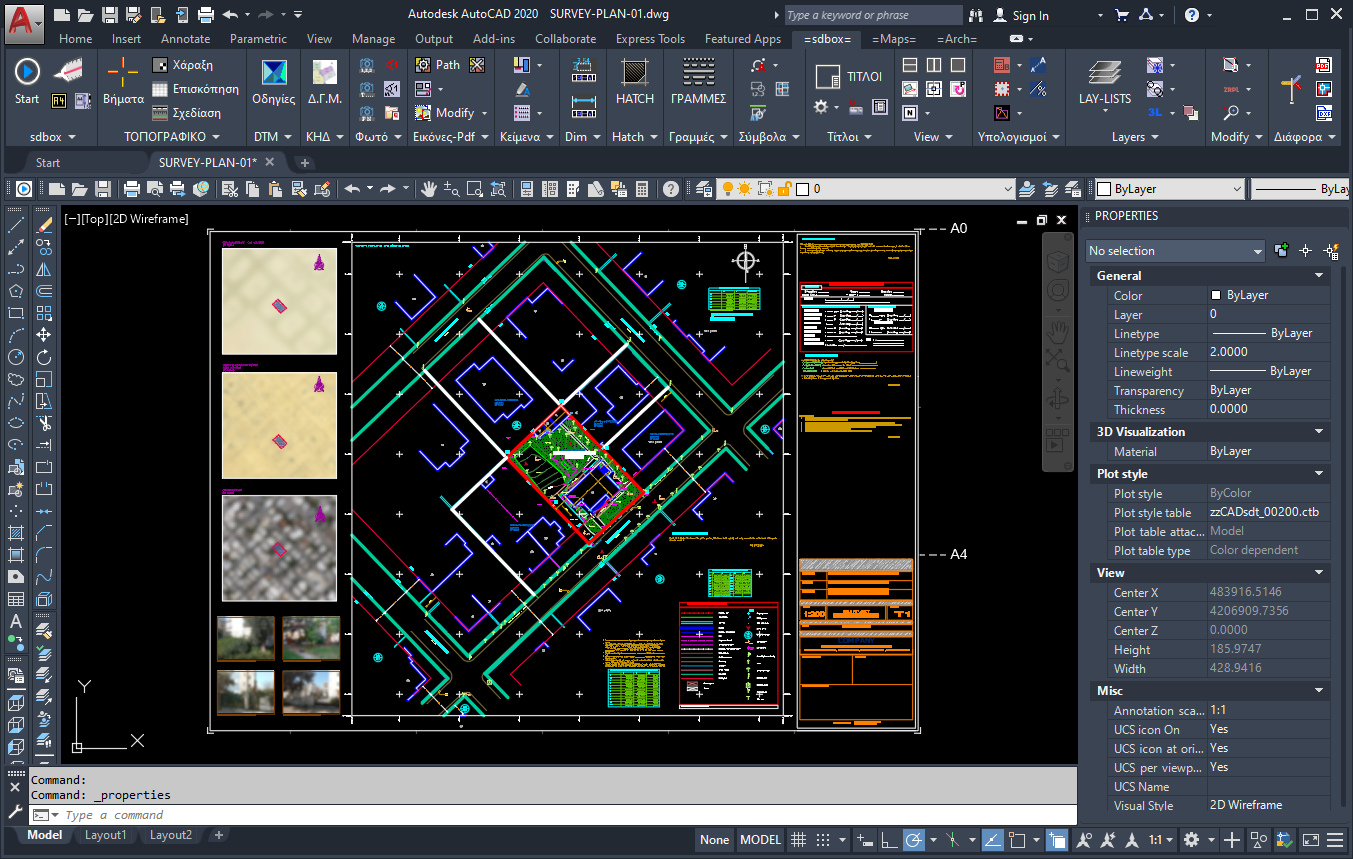
Survey Plan Drafting with SDBOX can cover the complete workflow, from initial drawing setup to final verification and print-ready PDF output.
No need to memorize commands or follow a rigid sequence - SDBOX provides the tools for each stage and allows you to work in the order that suits your project.
No need to memorize commands or follow a rigid sequence - SDBOX provides the tools for each stage and allows you to work in the order that suits your project.
1 Initial drawing settings
The process begins with proper preparation of the drawing.
In SDBOX:
In SDBOX:
- Recommended settings for topographic surveys are defined
- Layers, colors, line types and scale factors are specified
- Units are automatically configured according to topographic requirements
💡 Note: These settings are made once at the beginning of the drawing and form the basis for all subsequent steps.
2 Importing points and data
Next, the survey data is imported:
- Points from coordinate files (for example: Code, E, N, Z, Description)
- Reference points and characteristic points
✅ Checking and managing points
✅ Adjusting their appearance
✅ Easier drawing on dense surveys
3 Drawing existing conditions
Based on the points, drawing the existing conditions follows:
- Boundaries, buildings, fences, roads and other structures
- Natural elements and other survey lines
🚀 SDBOX provides specialized drawing tools that accelerate the process and ensure uniformity in the drawing.
4 Annotations, hatches and symbols
In the next stage:
- Hatches are applied to buildings, land, and areas
- Symbols are inserted (trees, wells, columns, etc.)
- Annotations and indications are added
Automatic adaptation: SDBOX commands automatically adjust sizes and appearance according to the drawing scale.
5 Elevations, contours and DTM
When required:
- Elevation reference point is defined
- Levels and elevations are imported
- Triangles and contours are created
- Checking and smoothing is performed
⚙️ Flexibility: This process can be done gradually and adapted to the project's needs.
6 Grid, reference system and orientation
Added to the drawing:
- Coordinate grid
- Reference system
- North arrow
Automation: All elements are inserted automatically, according to specifications.
7 Property boundaries, areas and tables
Followed by:
- Drawing property boundaries and adjacent properties
- Area calculation
- Creating tables of vertices, sides and coordinates
📊 Specialized tools: Provided for managing area calculations and tables.
8 Title, legends and declarations
In the final stage:
- The topographic title is inserted
- Legends for lines, symbols and hatches are completed
- Planning and building parameters, statements and other declarations are added
Organization: SDBOX organizes the elements so the drawing is ready for printing or digital delivery.
9 Verification and delivery
Before delivery, there are verification tools for:
🔍 Checking information
✅ Drawing completeness
✓ Correctness of symbols and texts
10 Printing to PDF
- Printing to PDF is done with one click
- Paper size and plot settings are selected automatically
- The result is a consistent, print-ready PDF
How to continue
📄 Open PDF "Survey plan step-by-step"
Complete and detailed presentation of all the above steps
📚 For each individual stage there are also:
Return to Manual Portal
- Videos (detailed list with links to all steps)
- Detailed documentation in Quick links
So you can delve deeper exactly where you need it.