Text Management in CAD Drawings
SDBox Design Software - Command guide for text alignment, editing, import/export and text management
Text Alignment ETT
Alignment of texts along the X or Y axis. Texts selected for alignment are moved (from their insertion point) only along X or Y, depending on the desired axis.
Steps
- Select a point for the Alignment Axis on screen.
- Choose alignment direction (Horizontal or Vertical).
- Select TEXT objects for Horizontal or Vertical alignment.
Select Point of Alignment Axis:
Select alignment direction (HOR. or VER.):
Select TEXT for HOR. or VER. alignment: Select objects:
Details
The texts you select move along X or Y without changing their original justification (Left, Right, Center, etc.).
The command works with Ortho mode ON because it concerns alignment only along X or only along Y.
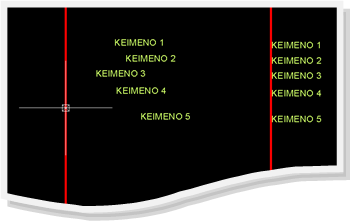
Example of text alignment
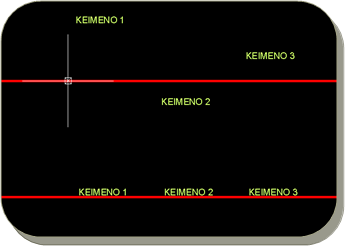
Result after alignment
Notes:
If you want texts to also acquire the same justification during alignment, select them before alignment, set the common justification, and then run the command.
Command Usage:
The command works on any type of text you select. Useful for aligning notes, labels, and annotations in drawings.
Tips:
For accurate alignment, use object snaps when selecting the alignment axis point.
Text Continuation from below... STT
Insertion of a new text line below an existing one with the same characteristics.
Steps
- Select the Text you want to continue from below.
- Enter New Text lines as needed.
Select Text you want to continue from below:
New Text: Enter text:
Details
From the text you select to continue from below, the following properties are retained for the new text line: same Layer, Color, TextStyle, Justify, TextHeight, Rotation, and Width Factor.
The new text is placed at the correct line spacing from the original selected text.
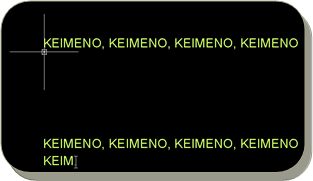
Example of text continuation
Command Usage:
Besides speed in adding new text lines below others, it helps avoid errors that are likely when copying texts and replacing their data.
Text Line Spacing KTT
Setting the distance between existing text lines to standard distance or custom distances.
Steps
- Select the TEXT lines whose spacing you want to change.
- Choose spacing option: Standard, Custom, or Gradual adjustment.
Select the TEXT lines to change spacing between them: Select objects:
Want line spacing Standard, Custom or Gradual selection? Standard/Custom/Gradual <Standard>:
Options
- Standard: Standard AutoCAD text line spacing (depends on Text Height).
- Custom: Set distance by entering a number or measuring on screen.
- Gradual: Gradually increase or decrease line spacing interactively.
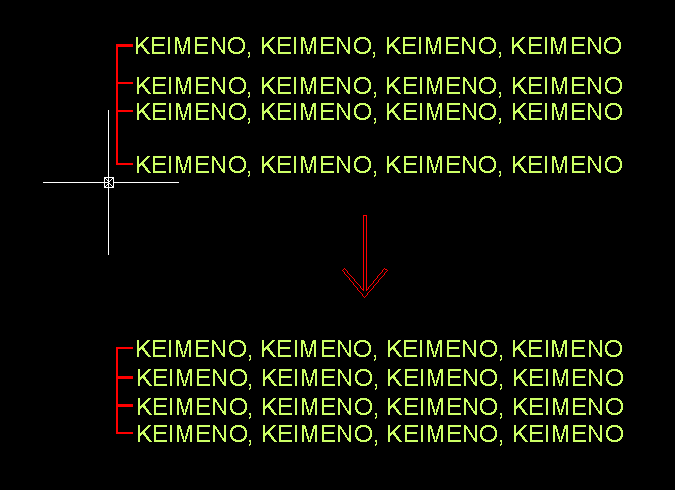
Adjusting text line spacing
Notes:
The command remembers the last used distance so you can apply the same spacing to other text lines.
The command executes only on Text objects.
Command Usage:
In all cases where drawing text lines need spacing adjustment for clarity and order.
Tips:
The "Gradual" option is also useful for filling empty drawing areas with appropriate text spacing.
Add Spaces KN
Gradual increase or decrease of a phrase length (Text format) by adding spaces between each character.
Steps
- Select TEXT for spacing expansion.
- Choose to continue adding spaces, remove added spaces, or finish.
Select TEXT for spacing expansion:
Continue spacing expansion? [U=Remove] U/Y/N <N>:
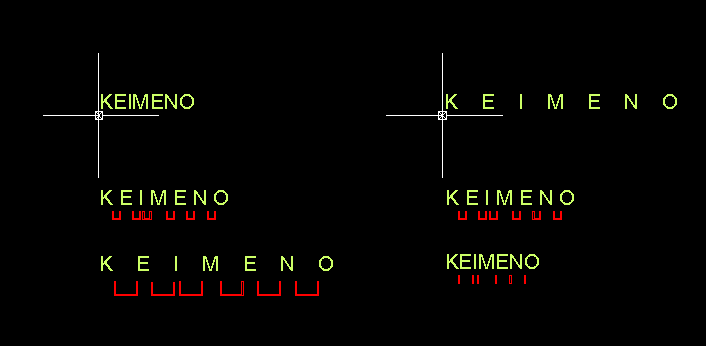
Example of text with added spaces
Notes:
The first time the command runs on a phrase, 1 space is added between each letter of each word and more spaces between words.
If the command runs on a phrase where letters of each word are already separated by spaces, then more than 1 space is added each time you run the command.
Command Usage:
Usually used on individual words or phrases consisting of 2 or 3 words. In longer phrases, adding spaces makes reading difficult.
Tips:
To remove spaces from a phrase or replace e.g., 3 spaces with 1, use the TTT command.
Delete Empty Texts TT0
Deletion of Text, Mtext, Arctext, Rtext objects without content.
Details
Empty Text, Mtext, Rtext and Arctext objects exist in the drawing but are not visible because their content has been removed. These objects occur when e.g., their content is cut for copying to another phrase.
These objects remain in the drawing and can be deleted with this command.

Empty text objects detection and deletion
Notes:
When the command ends writing "OK... nothing TT0." it means there were no Text, Mtext, Rtext, Arctext objects without content in the drawing.
Command Usage:
To lighten the drawing and avoid confusion when running other text commands that may involve objects without content.
Tips:
Run this command frequently in your own drawings and when receiving drawings from others.
Text Editor TTT
Editing of Text, Mtext, ArcText collectively or individually.
Features
Case conversion (upper/lower), underline, add text left/right, Greeklish translation, find and replace characters or phrases, change text height, Color, Style, Layer, etc.
Select T E X T for Editing: Select objects:
Operation
After selecting texts, the Text Editor window opens. You can edit each text individually, locate each text on the drawing screen, and search for phrases in the list of selected texts.
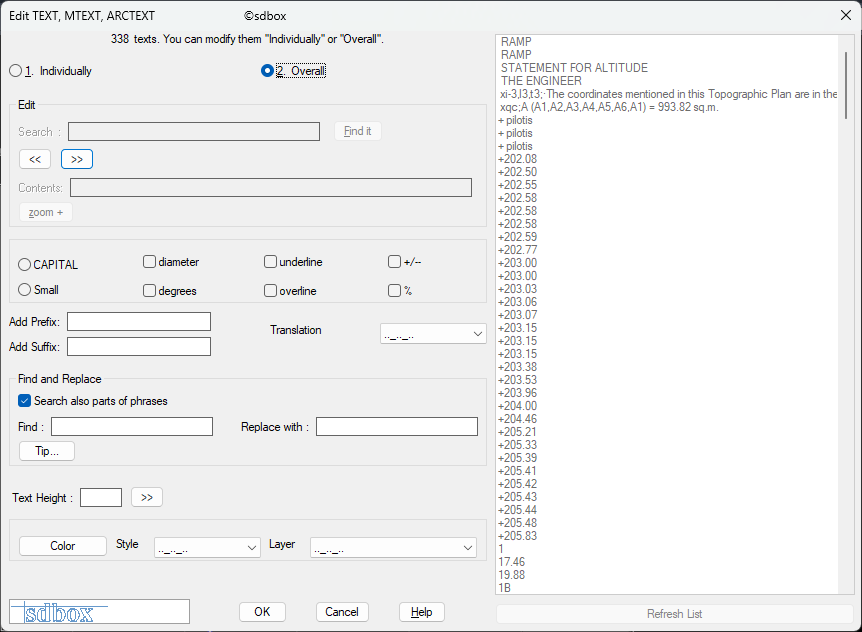
Text Editor main interface
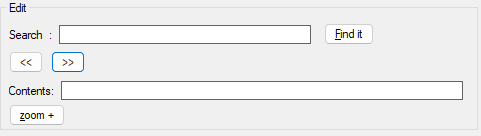
Individual text editing mode
Collective editing options
Search and Replace
You can use wild-cards for complex searches. For example, to find texts starting with "Roo" type "Roo*" in the Search field.
Notes:
When in collective editing mode, you can still use the "<< >>" arrows for navigation in the List and "zoom" to locate the phrase on screen.
In the List of selected Texts, Mtext with more than 250 characters are not displayed.
Command Usage:
Mass text corrections, adding or removing phrases from multiple texts simultaneously, and mass editing control.
Tips:
The first few times you use the command, try simple examples to familiarize yourself with phrase editing in the complex search and replace section.
Import Text from File F2T
Select a file and it is imported as text on screen.
Supported Formats
File types *.txt, *.csv, *.xls, *.doc, *.rtf, *.dat, etc. can be imported into the Drawing screen as Text or Mtext in grsdtopo1 font and size proportional to the print scale (for Note legends).
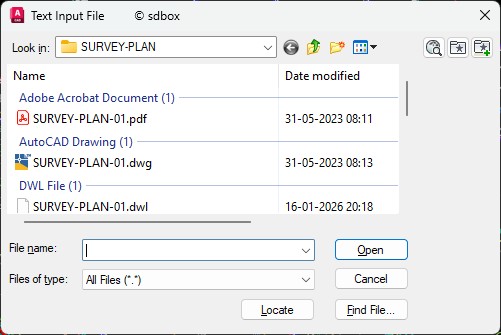
File selection for import
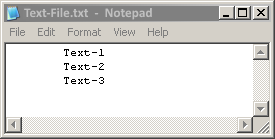
Text or Mtext import option
Command Usage:
Easy import of external text files into AutoCAD as Text or Mtext format and in print size proportional to scale.
Tips:
When importing files from MsWord or Excel, prefer files with simple settings and no macros or complex equations.
Export Text to File T2F
Export of selected texts from the Drawing to a file of your choice.
Details
Select Text, Mtext, ArcText from the AutoCAD drawing screen and you have the option to export the texts as-is or with their coordinates appended at the end of each.
Texts are exported in order of the Y coordinate so that texts in reading order are exported that way in the file.
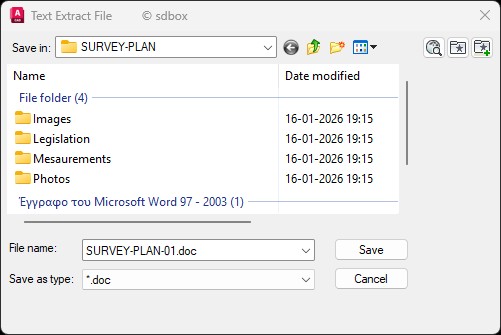
Path selection for export

Export with or without coordinates
Notes:
When exporting text content to MsWord (*.doc) or Excel (*.xls) files, the export files are in "Tab delimited text (txt)" format. You can save it in normal doc or xls format after opening.
The command name T2F is an abbreviation of "Text to File".
Command Usage:
Besides any other need to export text content to a file, you can export Texts to a MsWord (*.doc) file and perform spell checking. In this case, you can also export each text's coordinates to locate it on screen for correction.
Tips:
The SDBOX software has many capabilities for exporting files from the Drawing. For easy search of these files, choose clear names for the files you export.
Convert Text to Mtext TTMT
Joining simple Text lines into one Mtext.
Steps
- Select the Text lines to become Mtext.
- The command creates one Mtext containing all selected text lines.
Select the Text lines to become Mtext: Select objects:
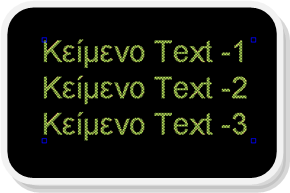
Multiple Text objects converted to single Mtext
Notes:
The created Mtext has the width of the longest line from the original Texts and height as many lines as you selected.
Texts in the Mtext are written in order of the Y coordinate of each.
The command name TTMT is an abbreviation of "Text To MtexT".
Command Usage:
In cases where you want to make changes to text lines while maintaining paragraph width (avoiding Cut & Paste).
Tips:
If the lines you select to convert to Mtext form a sentence together, after the Mtext is created, unify the sentences (with Backspace or Delete) so paragraphs work correctly within the Mtext width.
Change Block Texts DDE
Editing contents of Texts, Mtext, Attributes of a Block, dimension values (Dimensions) and Rtext.
The command was originally created for Acad 2000 with the purpose of being the same command that edits contents of Texts, Block and Dimension.
^ Back to topText Types Legend ZYPTT
Legend of Text, Mtext and Rtext types selected from the Drawing.
A list is created on screen (in legend form) showing the various text types existing in the Drawing based on TextStyle, Color, size, Layer, etc. and explanations you have given in a file using the ZYPTT1 or ZYPTT2 commands.
It usually serves cases where drawing texts are organized with different colors and Text Styles per category.
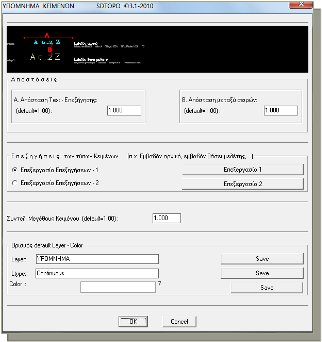
Text Types Legend - Click image for details
^ Back to topText Type Characters ZZCHR
Drawing all characters of a selected TextStyle in correspondence with grsdtopo1.shx and writing the number of each character.
The command was created for the needs of designing new Text Styles.
You can use it to see which characters a font cannot read or to see the number of some characters and add them to phrases based on the following guide:
To write the character: Alt + 0 + number.
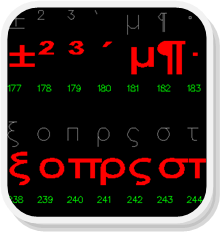
Character map display with character codes
^ Back to top