Modify Objects
SDBox Design Software - Tools for modification, conversion, overview, replacement, rotation, and scaling.
AMulti-Point Adjustment (Mean) ZMRS
 Watch Tutorial
MOVE - ROTATE - SCALE objects using start and end points, calculating average adjustment values.
The example below shows adjusting an image to the actual dimensions of a study using 3 points:
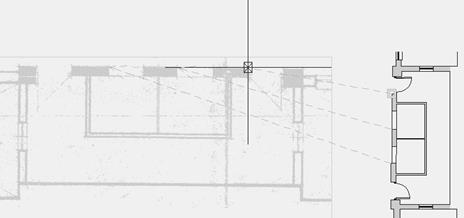
Adjusting an image to drawing coordinates
1st Point of object to transform (start) [Enter=Exit] :
New position-dependency of 1st Point (end) [Enter=Exit] :
Select the first point concerning the initial state. This point (and all others) does not need to be on an object you will select for adjustment.
P = continue previous: If you type P, the point pairs (start - end) used in the last command execution are automatically set. Useful for applying the same adjustment parameters to different objects or at different times.
New position-dependency of 2nd Point (end) [Enter=Exit] :
Select the next point of the initial state, then the target point for the destination.
- Yes: Continue selecting start and end point pairs.
- No: Average values for rotation, movement, and scale are calculated only from the pairs defined so far.
- Undo: Removes the last pair defined.
- Show Selected (F): Temporarily draws arrows from start to end points for verification.
After selecting point pairs, calculations are made for mean rotation, mean movement, and mean scale. You can choose which of the 3 actions to perform.
Tip:
If you have two drawing areas drawn at 1:1 scale and want to fit one to the other, it is recommended to perform only Move and Rotate so that the actual dimensions of the objects are not affected (no scaling).
Select objects:
Yes: Selected objects are copied, and Move, Rotate, and Scale are performed on the copies (originals remain).
No: Move, Rotate, and Scale are performed directly on the selected objects.
angle : 357.6155 scale : 0.739
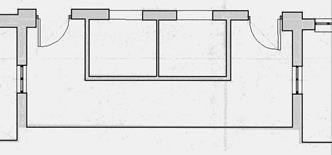
Final adjustment result
^ Back to topDifferent Plot Scales ZDFS
SCALE objects with options for different Plot Scales or conversion based on real vs. drawing dimensions.
First, objects are adjusted to their real dimensions, and then scaled up or down according to the different plot scales.
Example:
If you need to print two areas in the same Drawing with different plot scales. Select the general plot scale of the Drawing and the different scale for the second area. Based on the two scales, the Scale factor is calculated and applied to the selected objects of the second area.
Dimension on objects to be converted? :
Enter a number or pick a dimension on screen representing the length of an object (in the area where you want a different scale) for which you know the actual dimension.
This is useful when objects are not inserted at real dimensions. If objects are drawn at real dimensions, simply enter 1 here and in the next question.
Plot Scale of the rest of the Drawing? 1/<100> :
Enter the specific plot scale for the selected objects (e.g., 20) and the general plot scale of the Drawing. The scale factor is calculated based on these.
Select the objects to apply the Scale.
Pick the base point for the scaling operation.
^ Back to topConvert to Real Dimensions ZDFA
SCALE objects by selecting a dimension on screen and entering its real value.
Adjusts selected objects to their real dimensions.
Example:
If you have an image (e.g., an old floor plan) inserted at a random size and you know the real length of a specific dimension:
- Select or type the dimension on the screen.
- Type or select its real value.
- Select the objects to be scaled so that the selected dimension matches the real value.
Select/Overview Objects ZZS
Select - Overview Objects based on Filters.
Select the type of objects you want to view, and they are presented one by one on the drawing screen with options to edit them.
Example Scenario:
If you want to zoom in on all Blocks named "PIN_WALL", on Layer "A_PINAKAKI WALLS FREEZE ERG", with Color "bylayer" and Scale "0.00":
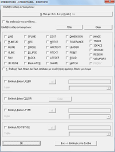
Select the button "Q. Same as selection [Pick]>>".
Note: Pressing Q selects this button automatically.
Select one of the target Blocks. A message appears listing the properties of the similar objects to be selected.
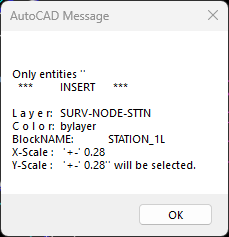
Select objects:
You can type "All" to select all similar Blocks in the drawing.

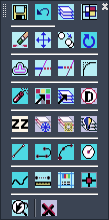
Navigation toolbar during drawing review
A Toolbar opens allowing you to choose "Next" or "End" instead of typing Y/N. Pressing Enter usually accepts "Next". The screen zooms to the first Block and the edit tab opens.
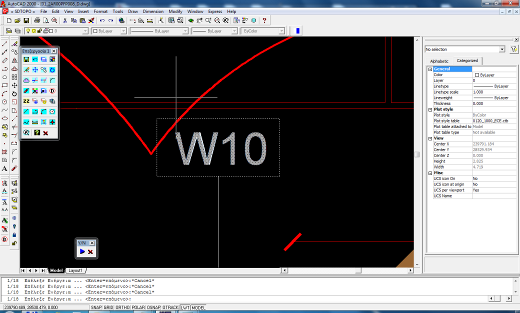
You can navigate the screen with the mouse wheel (zoom in/out, pan). During navigation, you can execute various overview and modification commands from the toolbar.
Result: 18 objects in the selected area.
Tip: In any command requiring selection (Select objects), type !zzss or P (previous) to re-select these 18 objects.
^ Back to topContinue Selection ZZSP
Continue the ZZS command if you interrupted it to execute another command.
You can interrupt ZZS at any time without viewing all objects. Use ZZSP to resume viewing the remaining objects.
^ Back to topLast Selection ZZSS
Selects (Reselects) all objects that participated in the last use of the ZZS command.
Once selected, you can execute any AutoCAD command on these objects or change their Properties.
Note: If objects do not appear selected (highlighted), execute Regen.
^ Back to topSelect for Properties ZZSA
Select objects via filters to change Properties or execute any AutoCAD command.
Works similarly to ZZS, but once objects are selected, they remain "gripped" (Selected) and the command ends, allowing you to immediately execute commands like Move, Copy, or change properties in the Properties palette.
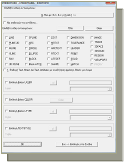
Replace with Block ZRPL
Select objects via filters to replace them with a Block of your choice on a predefined Layer.
You can replace or add Blocks to almost any drawing object.
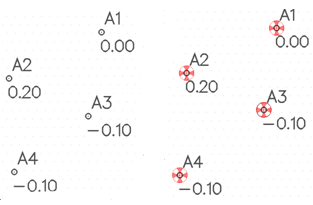
- The replacement Block is inserted at the insertion point (for Block, Text) or start point (for Line, Pline) or center of circles.
- If Text objects are replaced by Blocks with Attributes, you can choose to have the text content written into the 1st Attribute of the replacement Block.
- If replacing Block with Block, this transcription happens automatically.
- Replacement Blocks inherit the x,y,z scale of the original Blocks, or use 1,1,1 if replacing other objects.
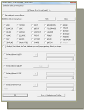
Select the objects to be replaced or to which a Block will be added.
Select the replacement Block. Note: You can select any Block from any path. The chosen Block is registered and suggested in future uses.

Choose whether to Delete or Keep the original selected objects.
Note: If the replacement Block already exists in the Drawing, you choose whether to Rename the existing one. This is only necessary if you have updated the Block definition and want the new version.
^ Back to topReplace on Original Layer ZRPLR
Select objects via filters to replace with a Block on the original Layer of the objects.
Works exactly like ZRPL, but instead of choosing a target Layer, the replacement Block is inserted on the Layer of the object it replaces.
^ Back to topAlign ZSTX
Align selected objects (via filters) to an imaginary line or a selected object.
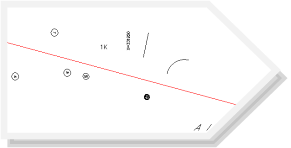
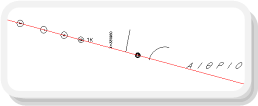
Alignment selection mode? [W= angle-direction , S= select object] W/S S> :
- W: Select a point and direction for an imaginary alignment axis (drawn temporarily).
- S: Select an object (ARC, CIRCLE, LINE, LWPOLYLINE, POLYLINE, SPLINE, ELLIPSE, XLINE, RAY) along which the objects will be aligned.
Select the objects to be aligned. The command proceeds to align them and informs you how many were aligned.
Rotate Selection ZRR
Selected objects rotate around their insertion point or acquire the same absolute angle.
[K= rotate by... N= type absolute angle, W= Define angle on screen, S= select object] K/N/W/S <K> :
- K (Relative): Rotate objects by a specific angle (typed or 2 points).
- N (Absolute): Objects rotate individually to acquire the specified angle.
- W (Screen): Define the final absolute angle using 2 points on screen.
- S (Match): Select a reference object; selected objects will rotate to match its angle.

Select the objects to rotate.
Pressing Enter or Yes rotates the objects by 90 degrees (1 quadrant) repeatedly.
^ Back to topChange Properties ZCH
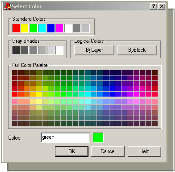
Select objects via filters to apply changes to Elevation, Color, Layer, Ltype, Ltscale, Ltweight, Thickness.
Works similarly to the AutoCAD Change command but uses advanced filtering and allows selecting properties (Layer, Line Type, Color) from visual tabs.
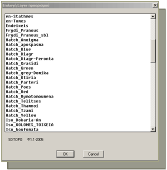
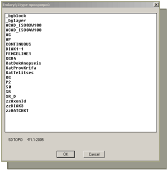
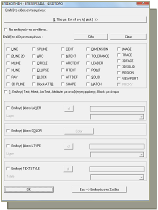
Change LtScale ZCHL
Multiplies the existing Ltscale of selected objects by a factor you provide.
Useful when changing the general drawing Ltscale or Plot Scale and you want lines to maintain their relative differences.

If you choose Yes to change the drawing Ltscale, a factor is calculated and proposed. Then select objects via filters to multiply their Line Type Scale by this factor.
^ Back to topChange LtWeight ZCHW
Multiplies the existing LineWeight of selected objects by a factor you provide.
Works exactly like ZCHL, but affects LineWeight instead of LtScale.
^ Back to topChange Hatch Scale ZCHHS
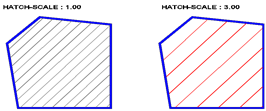
Multiplies the existing Scale of selected Hatch objects by a factor you provide.
Useful when changing plot scales, ensuring Hatches scale correctly.
^ Back to topCopy ZCC
Repeated Copy of objects selected via filters.
Functions with the same logic as the AutoCAD Copy command but adds filtering capabilities.
 ^ Back to top
Move ZMM
Move objects selected via filters.

Move Y ZMY
Selected objects move only along the Y axis.
Select objects via filters, define a base point and a destination point. The objects move to the Y-coordinate of the destination while keeping their original X-coordinate.
^ Back to topMove X ZMX
Selected objects move only along the X axis.
Select objects via filters, define a base point and a destination point. The objects move to the X-coordinate of the destination while keeping their original Y-coordinate.
^ Back to topErase ZEE
Remove objects from the drawing using filter selection.
Selection via filters makes it easy to delete specific objects amidst others you wish to keep.

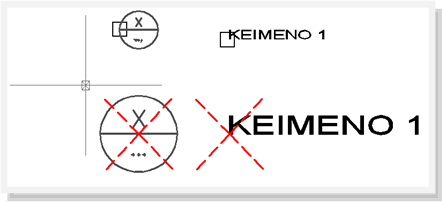
Scale from Insertion Point ZCS
Scale objects relative to their own insertion point.
Select objects via filters and enter a scale factor. Each object scales individually around its insertion point (Block, Text), start point (Line, Pline), or center (Circle).
 ^ Back to top
Rotate from Insertion Point ZCR
Rotate objects around their own insertion point.
Select objects via filters and enter an angle. Each object rotates individually around its insertion point (Block, Text), start point (Line, Pline), or center (Circle).
^ Back to topErase by Length LL0
Objects shorter than a specified length are removed from the drawing.
Select Lines, Plines, Splines, and Arcs to examine. Those with a length less than the number you provide are deleted. Useful for cleaning up zero-length objects.
^ Back to topFlatten (Z=0) ZZ0
Objects with Z not equal to 0.00 are moved to Z= 0.00.
If you don't need 3D objects, it is recommended to run this command frequently. Distances measured in AutoCAD are often 3D (slope) distances; if an object isn't at Z=0, measured distances might be incorrect.
Export to File ZXAG
Simple export of objects to a file, including insertion point or start point and content.
Procedure:
- Select objects to export via filters.
- Select the export file via Windows dialog (*.txt, *.doc, *.xls, etc.).
- The tab below opens:
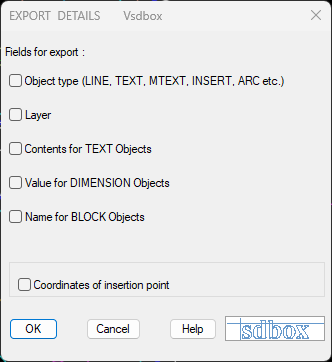
- Objects are exported based on your choices.
- Optionally, the export file opens automatically.