Photo Sketch Creation
SDBox Design Software - Insert position and direction symbol for photos with numbering, titles, and scale
Insert Photo Symbol PH
Insert symbol of photo position and shooting direction with photo number and continuous numbering.
Steps
- Select symbol size according to paper format.
- Choose Layer for 'Photos'.
- Enter next photo number (auto-counted or manual).
- Pick shooting point location.
- Pick shooting direction.
Enter Layer for 'Photos':
Drawing has 3 Photos [F1:?]=edit Next Photo Number?
...............shooting point of '54' <ENTER=Exit> :
...............shooting direction :
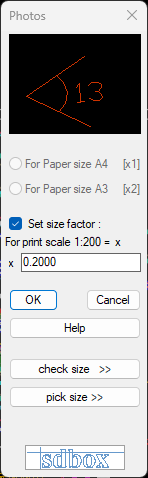
Photo symbol details
Symbol Size Selection
- 1.000 for A4 paper
- 2.000 for A3 paper
- Custom size
- Select from existing symbol on screen
- Check selected size with temporary drawing
Notes:
Existing symbols in the drawing are counted and the next photo number is suggested. You can enter any number or press Enter to accept the suggested one.
If you type "?" you can navigate in the drawing and execute various commands from an opening tab. You can edit already inserted symbols (rotate differently or add alphabetical characters to their name).
Command Usage:
Used for creating photo location sketches with automatic numbering and directional symbols.
Tips:
For drawings that constitute photo sketches, it is recommended to insert the paper block before inserting symbols using the XARTI command.
Detailed Process
You give the insertion point, the symbol is inserted (without number) and rotates around the point waiting for the shooting direction.
You give the point where the photo is looking towards, the symbol takes its final position and text with the photo number is automatically drawn with appropriate rotation for readability.
You continue with the next photos.
At the end of the command you are informed about how many symbols were inserted in the Drawing.
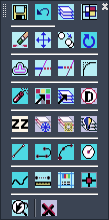
Navigation toolbar for photo editing
^ Back to topPhoto Counting PHLIST
Opens a file containing the names of photos inserted in the Drawing per Layer.
You can use this command to sort photos during printing.
You can save the file to a location of your choice.
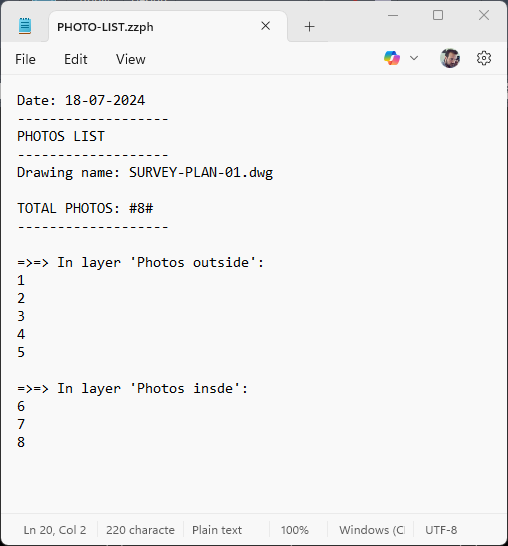
List of photos from drawing
Notes:
The file is useful for creating photo indexes and documentation.
Slanted Photo Title PHSTI1
Inserts the phrase "SKETCH OF PHOTO SHOOTING POSITIONS" in the Drawing in size proportional to A4 paper side.
Process
- Select first point of A4 paper long side [29.7cm].
- Select second point of A4 paper long side.
- Choose Layer for 'Titles'.
- Pick point on vertical side of paper for slanted title insertion.
- Select final placement point for slanted title.
Select 1st point of A4 paper long side [29.7cm]:
Select 2nd point of A4 paper long side [29.7cm]:
Enter Layer for 'Titles':
Select Point on vertical side of Paper for Slanted Title insertion:
Final placement of slanted Title:
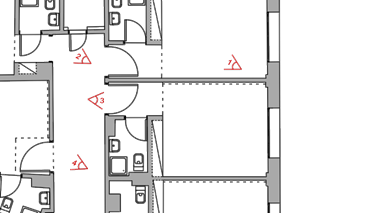
Slanted title placement example
Notes:
After selecting the 2 points, the print scale is calculated so that A4 prints at its actual dimensions, and accordingly the letter height of the slanted title is calculated.
The slanted title refers to cases where you compile a photo volume divided into various chapters (e.g., Building Levels) and the slanted title protrudes from the Volume so the user can easily find what they want.
Command Usage:
Used for creating prominent chapter titles in photo sketch documents.
Photo Title PHSTI2
Inserts 5 lines of Text (Project, Client, location, Date, Study type, Drawing type, scale) and Logo (small).
The phrases inserted remain in AutoCAD's memory for insertion in the same or another Drawing.
It is a quick way to insert a stamp with the drawing details and if you have many similar drawings you are informed by the command what you wrote last.
Process
- Select how to give print scale.
- Choose Layer for 'Titles'.
- Select point for caption insertion.
- Enter Project Title.
- Enter Client.
- Enter Project Location.
- Enter Date.
- Enter Notes (e.g., Photo Sketch).
- Enter Drawing Title (e.g., Drawing 01).
Enter Layer for 'Titles':
Select Point for Caption insertion:
Project Title? <STUDY 125> :
Client? <CONSTRUCTION LTD> :
Project Location? <Kifissias 65, Chalandri> :
Date? <July 2010> :
Notes <Photo Sketch> :
Drawing Title <Drawing 01> :

Photo title block example
Notes:
After entering the above fields, the Logo is automatically inserted as you have defined it in the directory: \\SDBOX\zzTitloi\Λογότυπα\Logotipo_Mikro.dwg
For each field, what you entered in the last use of the command in any drawing is suggested. You can accept the suggested value or enter a new one.
Command Usage:
Standardized title block creation for photo sketch drawings with persistent memory of last entries.
Photo Scale PHKLIM
By selecting the long side of A4 paper as drawn on screen, the print scale is calculated.
Details: Scale calculation methods
Notes:
This command helps determine the appropriate print scale for photo sketches based on actual paper dimensions in the drawing.
Short Title Editing ZSTI
Opens the drawing logotipo_mikro.dwg that participates in the PHSTI2 command and you can edit it.
Small logo editing interface
Notes:
Use this command to customize the small logo that appears in photo title blocks.
Set Photos Folder FFCHDIR
Definition of the directory where photos are located that can be opened during drawing with the DFF command.
In studies where you need to consult photos during design, you can type the photo number in AutoCAD and it opens automatically with the following commands.
Process:
- Define the folder containing the photos (FFCHDIR).
- After setting the folder, you can open it whenever you want (ZDFFC) or
- Open the photo you want at any time (DFF).
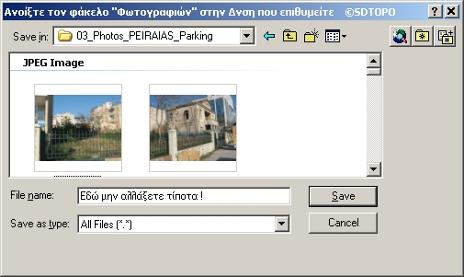
Photos folder selection dialog
Notes:
In each new Drawing, the directory will be selected as you define below, but you can also change it each time you want.
To set or change the photo address, you simply need to open (with the above window) the folder to any address you want.
Once you open the folder, without selecting anything else with the mouse, and press Save, the address is recorded and set as the photo search address used by the ZDFFC and DFF commands.
At the File Name position "Do not change anything here!" is written to remind you that after opening the folder you don't need to select a file or anything else, just press Save.
Tips:
You can change the photo address as many times as you want, even within the same Drawing.
You can open the folder with the ZDFFC command at any time in the Drawing.
Open Photos Folder ZDFFC
Opens the folder you have defined as containing the photos you will open with the DFF command.
When you type ZDFFC in the drawing, the photo folder you defined with the FFCHDIR command opens (via windows).
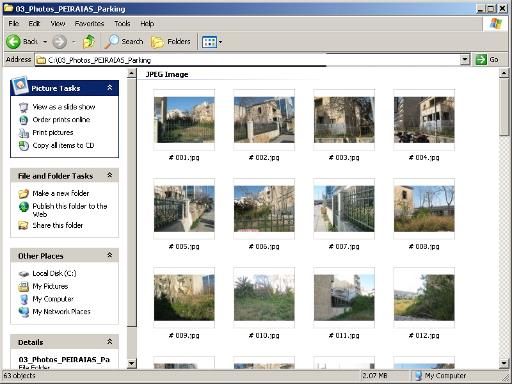
Photos folder window
Notes:
This folder will open in any drawing without needing to define it each time.
You can of course change it as many times as you want (even within the same drawing) with the FFCHDIR command.
Command Usage:
The command is designed for easy access to the photo folder, at any time, without the folder needing to be constantly open.
You can use this command for any folder you want to open frequently.
Open Photo DFF
Opens photo, based on its number, from the folder you defined with the FFCHDIR command.
You can type the photo number or select it on screen if your drawing contains the positions and names of the photos.
Select or type Photo name: 7
Search Process
When you type or select the number e.g. 7, the program searches in the predefined folder for: "# 7", "# 07", "# 007", "# 0007" for the photo name.
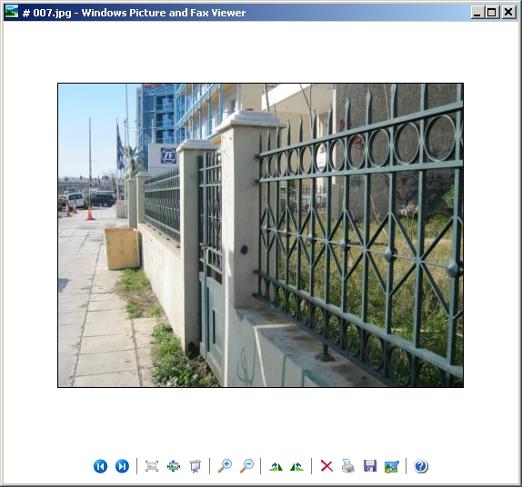
Photo selection and opening
Notes:
You can type the photo number or select an object from the drawing screen (Text or Block) that contains the name.
Note: You don't need to give the full name "# 007", just 7 is enough.
Command Usage:
Quick photo reference during drawing by simply typing photo numbers or selecting photo symbols in the drawing.