AutoCAD Floor Plan Drawing Commands
SDBox Design Software - Command guide for drawing floor plan elements (tags, windows, doors, section indicators, etc.)
Floor Plan Drawing Overview
Commands for drawing Floor Plan elements (tags, windows, doors, section indicators, etc.).

Floor plan sample

Video sample
See basic floor plan commands individually:
Important:
All tags (Texts, Blocks, symbols) are inserted into the Drawing in size proportional to the print scale.
Setting Default or minimum sizes
^ Back to topOpening Tag Selection ZKKP
Opens a tab where you can select the type of Opening for the tag to be inserted into the drawing with its details.
You can configure decimals, coefficients, size, etc.
The tags refer to Doors, Windows or other openings and contain information about opening type, width, sill height and lintel height.
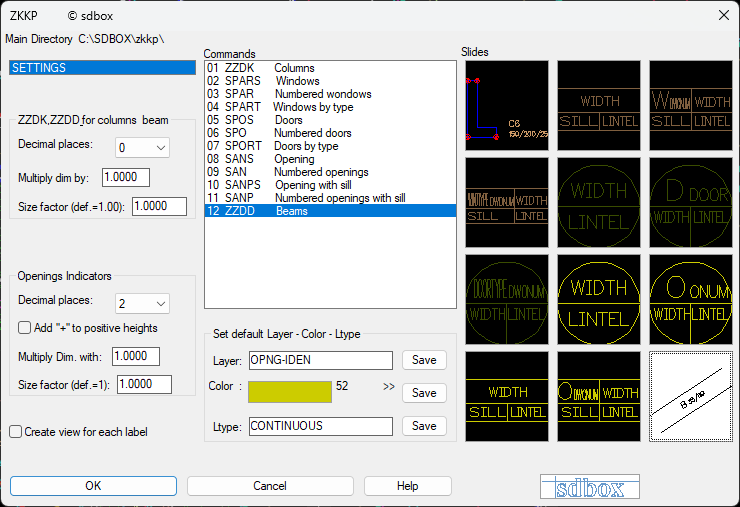
Opening tag selection interface
Selection Process
Select the type of Opening you want to add to the Drawing.
The type for opening tag you select is stored in the command's memory and suggested in each new use where you can accept it by simply pressing Enter.
Each command type for opening tag is analyzed below.
Details:
For layer selection: Layer Selection
Columns ZZDK
Select basic dimensions and the name of column, pillar or beam and then these are recorded in 2 lines of Text on screen.
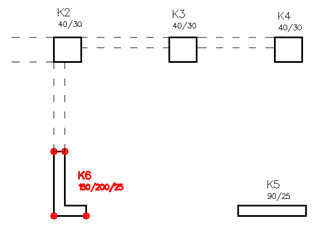
Column dimensioning example
Give the LAYER for 'Column dimensions':
Details: Layer Selection
1st Column Select the 1st point [U=Undo]:
150/200/25
Column code or other <K>:
annotations... in Drawing Layer 'Dim-kolones' : 5 , Column number ? <6>:
Final position for dimension K6:
Process Steps
- Select points on the column that define its basic dimensions (4 points in the above example)
- Give the prefix of the element being dimensioned (e.g., K for column, Υ for pillar, Τ for wall...)
- Each time you are informed about dimension annotations already in the drawing and based on these, the next column number is suggested or you can give your own
- Give on screen the placement point of the code and basic dimensions
- Continue with next Columns
Tips:
For each dimensioning you insert, its position is saved and you can search for it at any time with the ZVK command.
Windows, Openings with Sill SPARS, SPAR, SANPS, SANP, SPART
Insert tag for Window opening or other Opening with Sill where you select on screen or with calculations and operations width, sill height and lintel height.
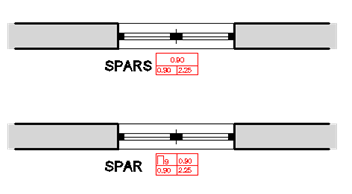
Window type symbols
Command Variations
- SPARS: Window (width, sill, lintel)
- SPAR: Window with numbering (width, sill, lintel). The letter Π is fixed and you give each symbol its number.
- SANPS: Opening (width, sill, lintel)
- SANP: Opening with numbering (width, sill, lintel). The letter Α is fixed and you give each symbol its number.
- SPART: Window with code numbering (width, sill, lintel). You give each symbol code and numbering. Use this type for Tag when windows are distinguished according to their type. You can also insert Window Type Legend YPPP.
Give the LAYER for 'Window Tag':
Details: Layer Selection
Give 1st point for Window width measurement (left->right) <U=Undo, ENTER=Exit>:
Give 2nd point for width <Enter=Undo>:
Windows in Drawing: 8 , Window number ? <9>:
Π9 ..width 1.17 E/D/P/!/!! write number WINDOW SILL ? <0.9>:
E/D/P/!/!! write number WINDOW LINTEL ? <2.25>:
Final position for Window Tag 'Π9':
Process Details
Give the 1st point at the edge of the opening (not at the frame).
Opening Tags should be placed on the side from which the floor measures the sill and lintel.
It is customary for tags to be placed so they are read from this side.
Each time the last sill you gave is suggested and you can accept it by pressing Enter or give a new number or do calculations.
The same applies above for the lintel.
Tips:
Place the symbol at the desired position. It is recommended to set as insertion point the middle of the width because the Block is designed to have the correct distance from the opening according to each scale.
For each symbol you insert, its position is saved and you can search for it at any time with the ZVBL command.
Doors SPOS, SPO, SPORT
Insert tag for Door opening or other Opening where you select on screen or with calculations and operations width and lintel.
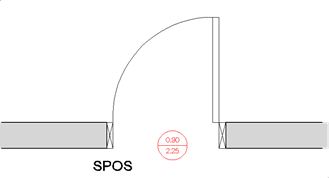
Door type symbols
Command Variations
- SPOS: Door (width, lintel)
- SPO: Door with numbering (width, lintel). The letter D is fixed and you give each symbol its number.
- SANS: Opening (width, lintel)
- SAN: Opening with numbering (width, lintel). The letter O is fixed and you give each symbol its number.
- SPORT: Door with code numbering (width, lintel). You give each symbol code and numbering. Use this type for Tag when Doors are distinguished according to their type. You can also insert Door Type Legend YPPP.
Give the LAYER for 'Door Tag':
Details: Layer Selection
Give 1st point for Door width measurement <U=Undo, ENTER=Exit>:
Give 2nd point for width <Enter=Undo>:
Doors in Drawing: 8 , Door number ? <9>:
Θ9 ..width 1.17 E/D/P/!/!! write number DOOR LINTEL ? <2.25>:
Final position for Door Tag 'Θ9':
Process Details
Give the 1st point at the edge of the opening (not at the frame).
Opening Tags should be placed on the side from which the floor measures the lintel.
Each time the last lintel you gave is suggested and you can accept it by pressing Enter or give a new number or do calculations.
Tips:
Place the symbol at the desired position. Continue with the next Opening.
For each symbol you insert, its position is saved and you can search for it at any time with the ZVBL command.
Zoom to Column ZVK
The position of Columns to which you have added name and dimensions with the ZZDK command has been saved and you can zoom with this command.
If you see the Drawing as below and type ZVK:
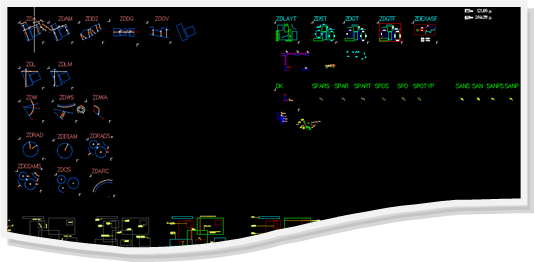
Column selection for zoom
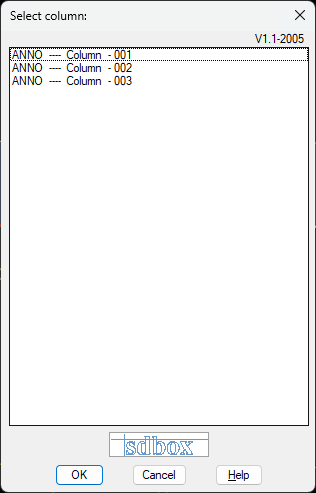
Column selection list
Selection Process
Select with double click or OK the Column you want and the screen zooms automatically to it.
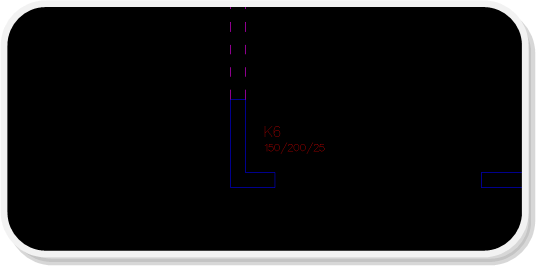
Zoom result to selected column
^ Back to topZoom to Tag ZVBL
The position of Openings to which you have added a tag with the corresponding commands has been saved and you can zoom with this command.
The command works the same way as the above ZVK with the difference that zoom is done to any tag you have inserted in the Drawing with any of the commands SPARS, SPAR, SANPS, SANP, SPART, SPOS, SPO, SPORT.
Opens the following tab where you select which opening tag you want to search for.
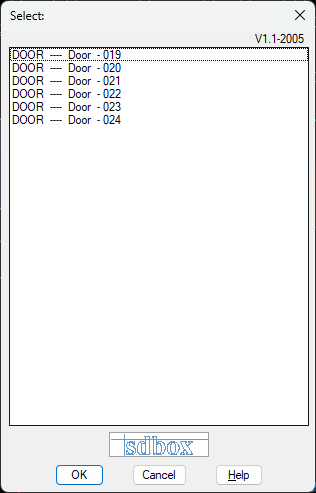
Tag selection for zoom
^ Back to topWindow/Door Legend YPPP
For openings for which you have drawn a tag with the commands SPART (for Window types) or SPORT (for Door types), you can add a legend to the drawing with predefined explanations for the type of openings.
The explanations of opening types are defined in a file (created with the PARPO1 command) and you can use them in any Drawing.
For example, if you have various types of openings in the Drawing and type YPPP then after selecting whether a Window or Door Legend will be inserted and defining in which area of the Drawing the search for codes will be done, the following Legend will be drawn for each code group:
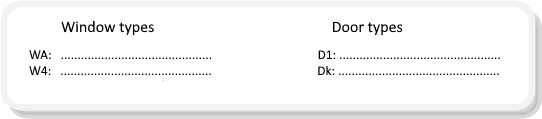
Window and door type legend
^ Back to topLegend Explanations ZPARPO1
Opens a Notepad file which contains the explanations of opening types (for the commands SPART or SPORT) which appear in the YPPP Legend.
You can add or change the explanations.
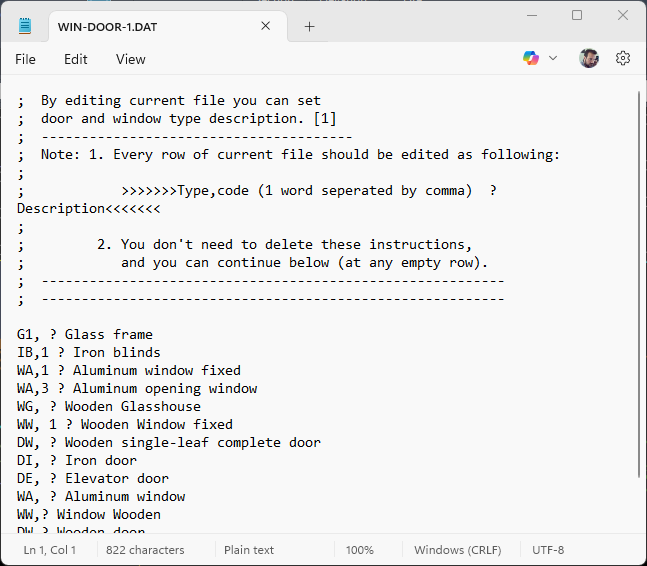
Legend explanations editing
The code groups that exist in the Drawing can be collected with the following command ZPARPOLIST.
^ Back to topDrawing Code List ZPARPOLIST
Opens a Notepad file which contains the opening types (for the commands SPART or SPORT) that the drawing contains.
You can copy the code groups to the file of the above command ZPARPO1 where you can also add the explanations.
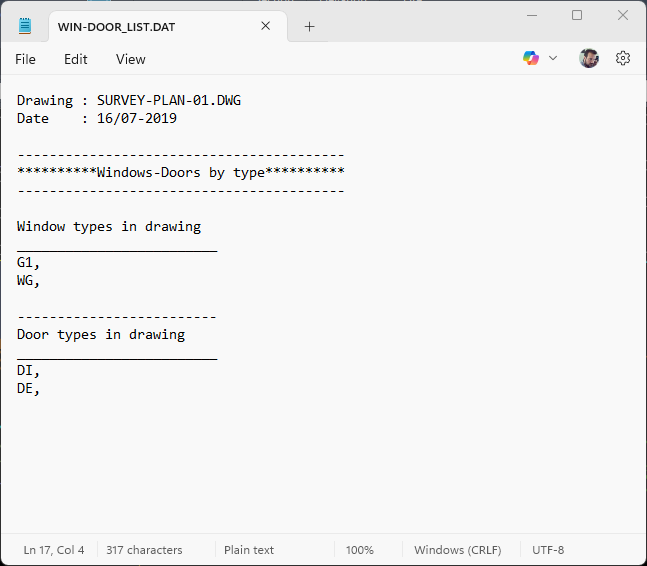
Code list from drawing
^ Back to topWindow Symbol PARATH
Drawing standard Window indication in plan (single, double, with internal or external shutter, overlapping or simple with multiple divisions).
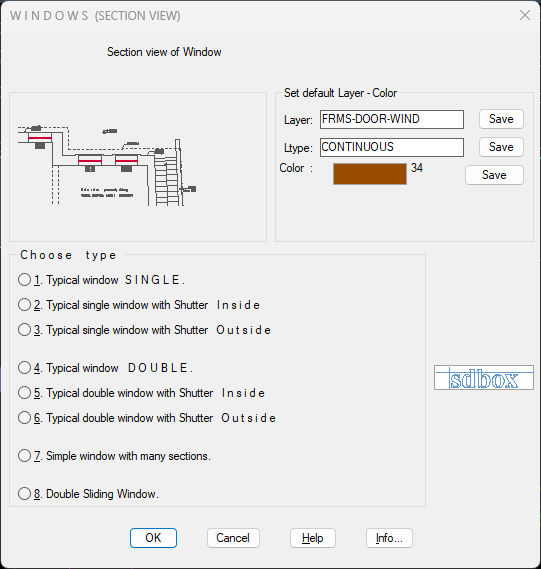
Window symbol selection interface
Window Types
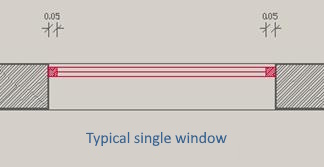
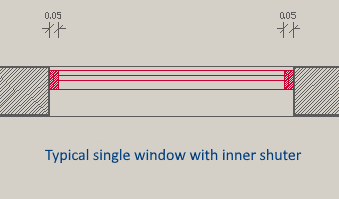
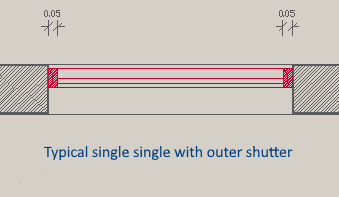
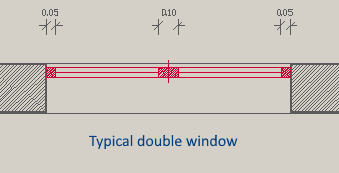
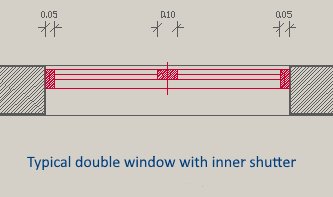
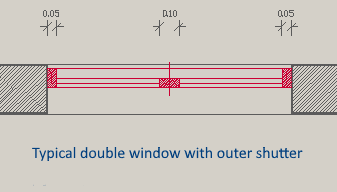
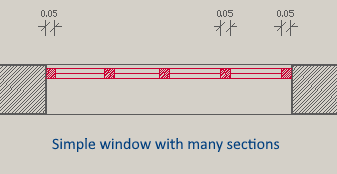
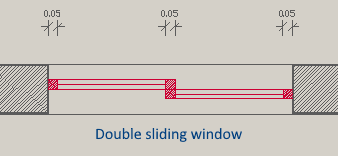
Selection Process
Select one of the above window types and then select on screen:
- 2 points for window length
- 1 point on the drawing side
- The number of divisions in case of window with divisions
- The frame thickness (0.05 is suggested or what you gave in last use of command)
- The frame position relative to opening depth (If frame is flush with the side you gave the length, give 0.00)
The frame is drawn automatically and you continue with the next.
Tips:
As soon as the command tab opens, you can type numbers 1...8 for type selection and with Enter continue.
Door Symbol PORTA
Drawing standard Door indication in plan (bare without frame, with 5x5 frame, with frame the entire wall thickness). You can also select drawing with dashed line (e.g., for elevation).
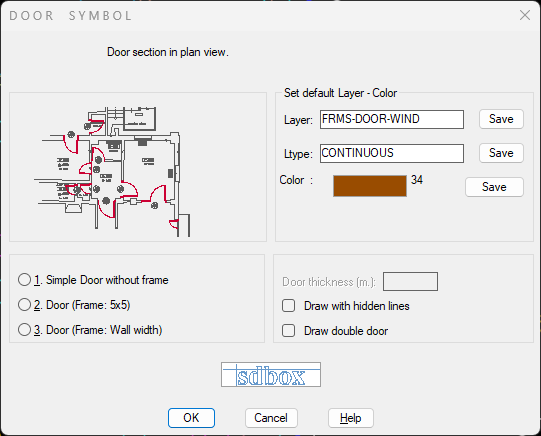
Door symbol selection interface
Door Types
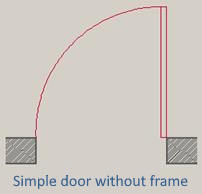
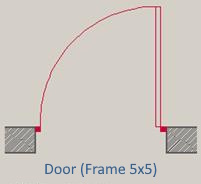
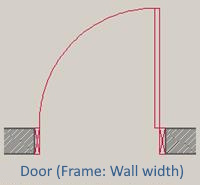
Selection Process
Select one of the above door types and then select on screen:
- 2 points for door opening (1st point on hinge side)
- 1 point on the side where the door opens
- Point for wall thickness in case of frame with entire wall thickness
The frame is drawn automatically and you continue with the next.
In the selection "1. Bare door without frames" you first set desired leaf thickness.
Tips:
As soon as the command tab opens, you can type numbers 1...3 for type selection and with Enter continue.
Elevation Insertion with Calculations ZST
Insertion into the drawing of Elevation or Height Block with type selection. You have ability for decimal specification, coefficients, symbol descriptions, etc. During drawing you can do calculations or operations.
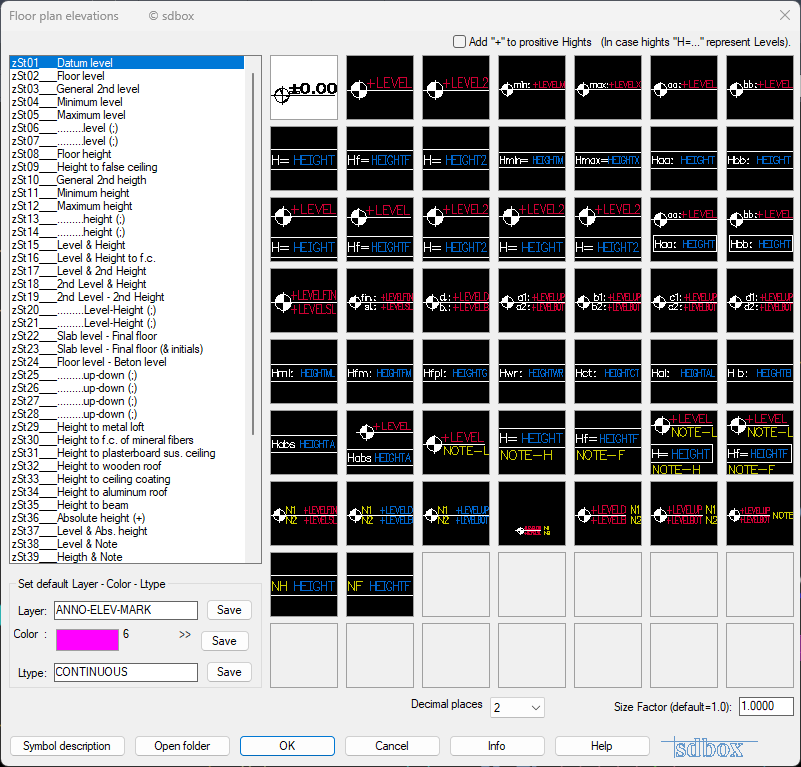
Elevation and height symbols
^ Back to topSection Indicator KTOMH
Select the position, direction, orientation and name of the Section and sectional lines at ends, direction arrows and the name are automatically drawn.
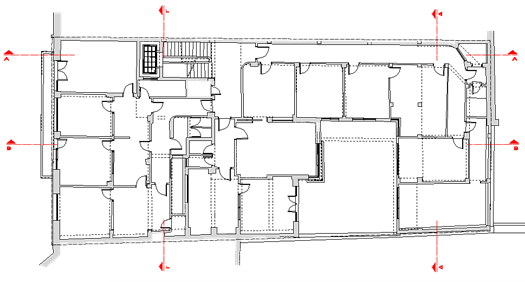
Section indicator creation
^ Back to topSmall Sections MTM
Select point, direction and name and the small Section symbol is automatically drawn which you place at its final position.
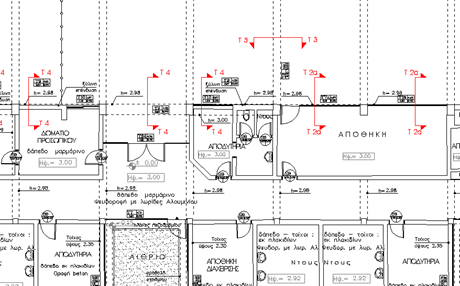
Small section symbols
^ Back to topStair Section Line TS
The line that "cuts" the stair at the Floor Plan level is drawn and instructions are given for the projection of the stair from below or the stair in elevation.
^ Back to top